Installing a fence is a process that requires careful planning, preparation, and execution. Understanding the step-by-step timeline can help property owners set realistic expectations and ensure the project progresses smoothly. Below is a detailed breakdown of the key stages involved in a typical fence installation timeline.
Step 1: Planning and Design (1-2 Weeks)
- Determine Purpose: Is your primary goal security, privacy, aesthetics, or marking property boundaries?
- Select Materials: Common options include wood, vinyl, aluminum, chain link, or composite materials. Each material has its advantages based on durability, cost, and maintenance requirements.
- Measure Area: Accurately measure your property’s dimensions to determine how much fencing material you’ll need.
This phase typically takes about 1-2 weeks depending on decision-making processes and consultation availability with contractors.
Step 2: Obtaining Permits (1-3 Weeks)
- Check Local Codes: Research zoning laws or HOA guidelines that may affect your project.
- Submit Permit Applications: Documentation often includes site plans, designs, and measurements.
- Neighbor Communication (if applicable): Some areas mandate notifying neighbors before work begins.
The timeline for securing permits can vary depending on local regulations but usually takes between 1 to 3 weeks.
Step 3: Site Preparation (1 Week)
- Marking Utility Lines: Contact utility companies to locate underground lines like gas or water pipes.
- Clearing Debris: Remove rocks, vegetation, or obstructions from the area where the fence will be installed.
- Surveying Property Lines: A professional surveyor may be hired to confirm accurate boundaries if disputes are possible.
Proper preparation typically takes up to one week but ensures smooth progress during installation.
Step 4: Materials Delivery & Inspection (1 Week)
| Material Type | Typical Delivery Timeframe |
| Wood | 5–7 business days |
| Vinyl | 7–10 business days |
| Aluminum | 10–14 business days |
After delivery: – Inspect all materials for defects such as warping or damage. – Ensure quantities match invoiced orders.
This phase is critical because undetected issues can delay further progress.
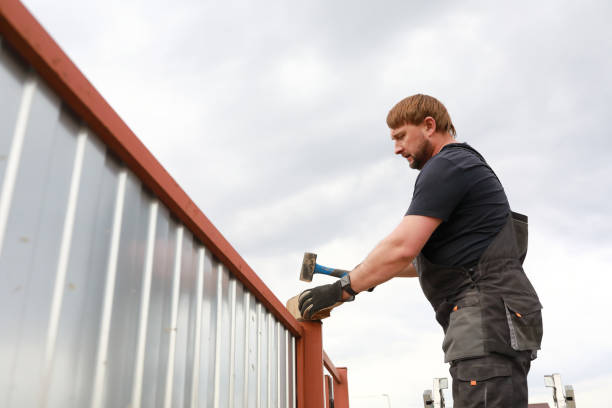
Step 5: Fence Installation (2 Days – 1 Week)
- Holes are dug at measured intervals along the boundary line.
- Depth depends on both local frost lines and structural needs.
- Posts are inserted into holes then secured with concrete for stability.
- Drying time ranges from several hours up to two days depending on weather conditions.
- After posts have set firmly in place rails are attached followed by panels slats gates etc
During this stage its important teamwork ensures alignment consistency leave result aligned regulations requirements
The Complete Fence Installation Process with a Fence Company Gainesville FL
Installing a fence is a significant project that involves multiple steps and meticulous attention to detail. From the planning phase to final inspections, understanding each part of the process can help ensure success. Below, we break down the entire fence installation process to help you better understand how it works.
1. Planning and Preparation
Effective planning is the cornerstone of a smooth fence installation. During this phase:
– Define Your Goals: Determine whether your fence is for privacy, aesthetics, security, or property boundary purposes. – Choose Materials: Select materials that align with your needs (e.g., wood for aesthetics, vinyl for low maintenance, or chain-link for cost-effectiveness). – Set a Budget: Establishing a clear budget prevents unforeseen expenses later in the project. – Obtain Permits: Check local building codes and secure permits if required.
2. Property Evaluation and Measurements
Proper site evaluation prevents mishaps during installation: – Conduct a survey of your property boundaries to avoid disputes with neighbors. – Measure the designated area carefully. This includes marking corners and potential gate locations. – Identify any underground utilities by contacting relevant utility companies.
| Step | Key Activity | Why It’s Important |
| 1 | Survey property lines | Prevents legal disputes |
| 2 | Mark critical points using flags | Ensures accurate placement |
| 3 | Locate underground utilities | Avoids damage and ensures safety |
3. Site Preparation
Once planning is complete: – Clear vegetation or debris in the designated area where the fence will be installed. – Level uneven terrain to ensure a stable foundation for posts. – Mark holes for post placement using stakes and string lines.
4. Installation of Fence Posts
The posts provide structural integrity to your fence: 1. Dig post holes at consistent depths (usually one-third of the post height).
2. Use concrete to secure each post in place for added strength and durability.
3. Ensure posts are aligned properly using a level before allowing them to set.
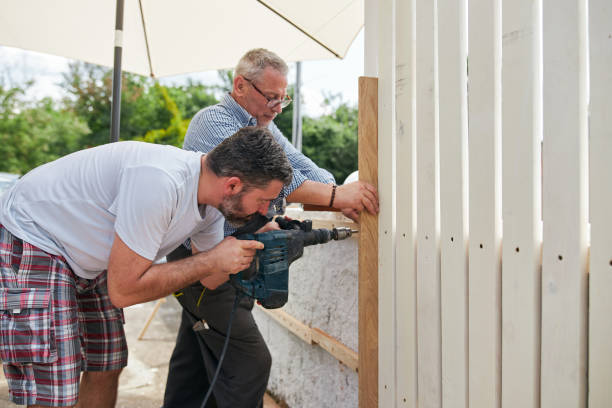
5. Panel Installation
After ensuring posts are firmly in place: – Install fencing panels or pickets between posts as per your chosen design. – Use appropriate fasteners (e.g., nails or screws) based on material type. – Regularly check alignment during panel installation.
6. Gate Installation
If your project includes gates: – Attach hinges securely to both the gate frame and adjacent posts. – Test gate movement to ensure smooth opening and closing without sagging.
7. Finishing Touches
Ensure longevity by following these steps after installation: – Apply weather-proofing treatments if you’re using materials like wood. – Inspect all fasteners, ensuring they are tight and secure. – Backfill around posts with soil or gravel for added stability.
By understanding each stage of this comprehensive process, homeowners can approach their fencing project confidently while preventing common errors that arise from lack of preparation or oversight during installation.
Planning and Permits with a Trusted Fencing Contractor Gainesville FL
Proper planning and obtaining the necessary permits are crucial steps in ensuring a smooth and legally compliant fence installation. Neglecting these aspects can lead to delays, fines, or the need to restart the entire project. Below is a detailed guide on how to effectively plan and manage permits for your fencing project.
Understanding Local Regulations
Before starting any installation, familiarize yourself with local zoning laws, homeowner association (HOA) regulations, and municipal codes. These rules dictate:
– Maximum allowed fence height
– Approved materials (e.g., wood, vinyl, metal)
– Property line setbacks
– Visibility restrictions for safety near intersections
Failing to comply with these regulations can result in legal trouble or forced removal of the fence.

Steps to Obtain Necessary Permits
- Research Permit Requirements
Check with your city or county zoning office to determine if you need a permit. Even if your area doesn’t require one, some HOAs might still require prior approval. - Prepare Documentation
Gather all necessary documents for submission. This may include: - A property survey or site map indicating fence location
- Design plans specifying dimensions and materials
- Evidence of HOA approval (if applicable)
- Submit Application
Apply through your local government’s permitting office either online or in person. Be prepared to pay an application fee during this step. - Review Process
The zoning board will review your application and may request changes before approval. This process might take days or weeks depending on your location. - Approval and Permit Issuance
Once approved, you’ll receive a permit allowing you to begin the installation process.
Budget Preparation
- Include costs for permits in your overall budget.
- Account for potential fines if any rules are inadvertently violated.
Boundary Identification
- Clearly mark property lines using a professional surveyor if needed.
- Avoid encroaching on neighboring properties as this could lead to disputes or legal issues.
Utility Checks
Contact utility companies before digging postholes to identify underground lines such as gas pipes or electrical cables that could pose hazards during installation.
Example of Permit Costs
| Permit Type | Cost Range | Notes |
| Residential Fence Permit | $20–$150 | Varies based on city/county guidelines |
| Additional HOA Approval Fee | $50–$200 | Charged only in HOA-governed areas |
| Property Survey Fee | $300–$700 | Optional but recommended prior to work |
Benefits of Proper Planning and Permits
Taking the time to plan thoroughly ensures: 1. Legal compliance. 2. Prevention of costly mistakes. 3. Smooth progress without interruptions from local authorities. 4. Good relationships with neighbors by avoiding boundary disputes.
By understanding the importance of planning and obtaining permits early on, you’ll set yourself up for success in completing your fencing project efficiently and without complications.
Site Preparation Essentials for Smooth Fence Installation
Proper site preparation is a critical step in ensuring a smooth and successful fence installation. Preparing your property correctly not only helps prevent delays but also ensures the longevity and stability of your fence. Below, we’ll break down the essential steps for effective site preparation.
1. Assessing the Property
Before diving into any physical preparation, it’s vital to assess the property to understand its unique characteristics and potential challenges.
- Identify Boundaries: Verify property lines using official surveys or records to avoid building on a neighbor’s land.
- Evaluate Terrain: Check for slopes, uneven ground, or obstructions like rocks, tree roots, or buried utilities that may complicate installation.
- Measure Your Space: Accurately measure the area where the fence will be installed to ensure you order enough materials and avoid overspending.
2. Clearing the Area
Clearing the installation zone is crucial to create a clean workspace for workers and ensure proper placement of fencing materials.
Steps to clear your site:
– Remove Vegetation: Trim bushes, cut back overhanging tree branches, and mow grass in the installation area.
– Dispose of Debris: Remove rocks, fallen branches, and discarded items that may obstruct digging or post placement.
– Level Ground as Needed: For uneven terrain, leveling specific areas can create a more stable foundation for fence posts.
3. Marking Fence Lines
| Tool/Material | Purpose |
| String Lines | Outline where the fence will be placed |
| Stakes | Secure string lines at corner points |
| Measuring Tape | Ensure proper spacing between posts |
Tips:
– Mark corners and gate locations first. – Double-check alignment by stepping back and visually inspecting string lines.
4. Checking Underground Utilities
Before digging post holes, contacting local utility companies is essential to avoid damaging buried pipes or wires.
Key considerations:
– Call your local utility marking service (e.g., 811 in the U.S.) at least 2–3 days before beginning work. – Mark identified utilities with flags or spray paint to ensure they’re avoided during digging.
5. Soil Testing (Optional)
- Sandy Soil requires deeper posts or concrete footings for stability.
- Clay Soil may require drainage solutions around posts to prevent water retention.
- Rocky Soil might involve specialized tools like augers or jackhammers when digging holes.
This step is particularly important if you live in areas with extreme weather conditions that could affect soil integrity over time.
6. Gathering Tools and Materials
Common Tools Needed:
- Post hole digger/auger
- Level
- Shovel
- Hammer
- Tape measure
Materials Checklist:
| Component | Purpose |
| Fence Panels | Main structure of the fence |
| Posts | Provide support; must be installed first |
| Concrete | Stabilizes posts |
| Fasteners | Connect panels securely |
Confirm that all materials are free from defects before proceeding with installation.
Properly preparing your site ensures fewer unexpected issues arise during construction while speeding up overall project timelines. These steps contribute significantly to achieving a strong, durable fence designed to last for years.
How Materials Delivery and Inspection Influence Fence Installation
A critical yet often overlooked step in the fence installation process is the delivery and inspection of materials. The quality, timing, and condition of materials can significantly impact the efficiency and success of your project. Addressing this stage with attention to detail ensures a smooth installation process, minimizes delays, and avoids unforeseen costs.
Importance of Timely Material Delivery
- Clear Communication with Suppliers: Coordinate with suppliers regarding timelines and ensure they understand your project’s schedule.
- Plan for Lead Times: Certain materials, such as custom-designed or specialty fences, may have longer lead times. Factor this into your planning phase.
- Verify Storage Options: Make sure there’s adequate space to store delivered materials safely until the installation begins.
Conducting a Thorough Inspection Upon Delivery
Inspecting delivered materials is essential to ensure quality and accuracy before installation begins. Damaged or incorrect items could lead to delays if replacements are required at the last minute.
- Look for cracks, warping, or other visible defects in wood or vinyl panels.
- Check metal fences for signs of rust or structural weaknesses.
- Cross-check the delivery against your purchase order or bill of materials.
- Ensure that all fasteners, brackets, posts, gates, and other components are present.
- Confirm that the delivered material matches your design specifications (e.g., color, style, dimensions).
Pro Tip: Take photographs of any damaged items upon delivery as evidence when contacting your supplier for replacements.
Impact on Installation Timeline
| Condition | Impact on Timeline | Recommended Action |
| Materials arrive intact | No delays; installation proceeds smoothly | Proceed with site preparation |
| Minor damage detected | Possible short delay depending on severity | Request replacement/repair immediately |
| Major damage detected | Significant delays likely | Pause work; negotiate expedited replacement |
Best Practices for Managing Material Delivery
- Schedule Deliveries Strategically: Aim to receive materials shortly before they are needed to avoid prolonged storage periods.
- Work with Reputable Suppliers: Choose vendors known for reliable deliveries and high-quality products.
- Have Contingency Plans: Prepare backup options in case issues arise with deliveries or inspections.
Taking these steps ensures that material-related challenges do not derail your fence installation project while setting a solid foundation for a successful build process.
Fence Installation Process from Start to Finish
Installing a fence is a structured process that involves several key steps, each contributing to the durability, functionality, and overall appearance of the final product. Below is a detailed breakdown of the fence installation process from start to finish.
1. Initial Consultation and Planning
The journey begins with determining your fencing needs. Whether it’s for privacy, security, or aesthetic purposes, careful planning ensures the project aligns with your goals.
Key steps at this stage: – Define the purpose of the fence (privacy, security, aesthetics). – Select a fencing material (wood, vinyl, metal, composite). – Determine your budget. – Consult with fencing contractors for measurements and estimates. – Confirm property boundaries to avoid encroaching on neighboring land.
2. Obtaining Permits and Approvals
Most municipalities have regulations governing fence installation. Securing proper permits ensures your project meets local zoning laws and codes.
What you’ll need: – Research zoning regulations in your area (height limits, setbacks). – Submit permit applications if required. – Inform neighbors about your plans to maintain good relations.
3. Site Preparation
A well-prepared site reduces delays during installation.
Steps involved: 1. Utilities Check: Contact utility companies to mark underground lines. 2. Clearing Area: Remove vegetation, rocks, or debris that may obstruct construction. 3. Measuring and Marking: Use stakes and string lines to outline the fence perimeter accurately.
4. Delivery and Inspection of Materials
Once materials are delivered: – Inspect all components for damage or defects. – Confirm that quantities match the order specifications.
This step ensures there are no surprises during installation.
5. Post Installation
Setting posts is one of the most critical aspects of ensuring fence stability.
Process overview: 1. Dig post holes at equal intervals along marked lines (depth depends on material and height of the fence). 2. Place posts in holes and ensure they are level using a spirit level. 3. Fill holes with concrete or compacted soil for stability. 4. Allow adequate curing time for concrete before moving forward.
6. Securing Rails or Panels
Attaching rails or panels defines the structure of your fence.
Steps include: 1. Install horizontal rails between posts (for picket-style fences). 2. Attach prefabricated panels if applicable for materials like vinyl or chain link. 3. Ensure all fixtures are secured tightly using screws or fasteners.
7. Adding Gates and Hardware
Guidelines for gate installation: – Use heavy-duty hinges for durability. – Ensure gates align properly with neighboring sections for smooth operation. – Add latches/locks based on security requirements.
8. Final Touches: Painting/Staining
Options: | Type | Benefits | |————–|———————————-| | Staining | Highlights natural wood grain | | Painting | Offers UV protection & color choice |
This step protects your investment from weather damage while enhancing appearance.
By following these steps in order, you can ensure a well-executed fencing project that meets both functional needs and aesthetic preferences while standing strong against time and elements alike.
Final Inspection and Cleanup Tips for Your Fence Installation Gainesville FL
Once your fence installation is complete, the final inspection and cleanup are essential steps to ensure a lasting, quality result. These steps not only verify that the work meets your expectations but also help maintain the appearance and integrity of the fence over time. Below is a detailed guide on how to conduct a thorough final inspection and manage the cleanup effectively.
Conducting a Final Inspection
- Ensure all fence posts are straight and properly aligned.
- Look along the top of the fence to verify it maintains a consistent height.
- Test each post by gently shaking it to confirm stability.
- Inspect fasteners (screws, nails, or brackets) for proper placement and tightness.
- Open and close gates multiple times to ensure smooth operation.
- Confirm that gate latches align correctly and lock securely.
- Look for cracks, chips, or other imperfections in wood, metal, or vinyl materials.
- Verify that treated wood has been sealed if necessary or check for corrosion-resistant coatings on metal components.
- Measure gaps between pickets (for picket fences) or panels (for privacy fences) to ensure uniformity.
Cleanup Essentials After Installation
Tools and Materials
- Remove leftover construction materials such as wood scraps, nails, screws, or cement bags from the site.
- Collect all tools used during installation.
Ground Cleanliness
- Rake up sawdust, dirt piles, or grass clippings caused by digging postholes or cutting materials.
- Fill any uneven patches in your lawn created during construction with soil.
Waste Disposal
Plan for responsible disposal of waste: 1. Recycle leftover materials like metal scraps if possible. 2. Use municipal services or local waste management facilities for disposing of non-recyclable items. 3. Store spare items such as screws or small sections of fencing material safely in case future repairs are needed.
Post-Cleanup Maintenance Tips
Once cleanup is finished, follow these maintenance suggestions to preserve your new fence: – Apply an appropriate weatherproofing solution if it hasn’t been done during installation (e.g., stain/sealant for wood). – Inspect landscaping near the fence. Trim bushes or vines that could damage fencing over time. – Water regularly around posts if recently dug soil remains loose to promote settling without gaps forming at the base.
| Task | Importance Level | Recommended Frequency |
| Fence alignment check | High | Post-installation only |
| Cleaning surrounding area | Medium | Immediately after |
| Apply sealant/weatherproofing | High | As per material specs |
Taking care of both inspection details and proper cleanup will ensure your new fence remains functional while enhancing curb appeal in the long run. By dedicating attention to these final steps, you’ll set yourself up for success with minimal concerns down the road.
- Key Factors That Impact Timelines for Fence Installation Gainesville FL
- How a Fence Company Gainesville FL Can Help Solve Common Fencing Problems and Boost Your Property’s Security
- Step-by-Step Guide to Fence Repair Gainesville FL and Installation Timelines
- How to Identify and Verify the Best Fencing Contractor Gainesville FL for Your Needs
- Effective Solutions for Fence Installation Gainesville FL Homeowners Should Know
- Fence Repair Gainesville FL: Common Issues and Effective Fixes for Your Property